Create an Azure file share and Mount Windows and Linux Vm's:
Create an Azure file share and Mount Windows and Linux Vm's:
Two types of File Share Protocol:
SMB Protocol File Share (Server Message Block)
NFS Protocol File Share (Network File share)
SMB File Share:
Performance requirements:
Standard file shares ,hard disk-based (HDD-based) hardware
Premium file shares, solid-state disk-based (SSD-based) hardware.
Redundancy requirements:
Standard file shares offer locally-redundant (LRS), zone redundant (ZRS), geo-redundant (GRS), or geo-zone-redundant (GZRS) storage, however the large file share feature is only supported on locally redundant and zone redundant file shares. Premium file shares do not support any form of geo-redundancy. Premium file shares are available with locally redundancy and zone redundancy in a subset of regions.
File share type:
Standard file shares (GPv2), LRS/ZRS
Standard file shares (GPv2), GRS/GZRS
Premium file shares (FileStorage), LRS/ZRS
We need a storage account to create a file share. Please refer Azure Administration Document for storage account creation.
While creating storage ,Enable file share option.

Create a brand new Windows and Linux Virtual machines:
Ensure port 445 is open: SMB communicates over TCP port 445 - check to see if your firewall is not blocking TCP ports 445 from client machine.
Create a file share:
Go to Storage account >File share>+ File Share>Create

Click on the Fileshare you created>Upload any file from your Local machine
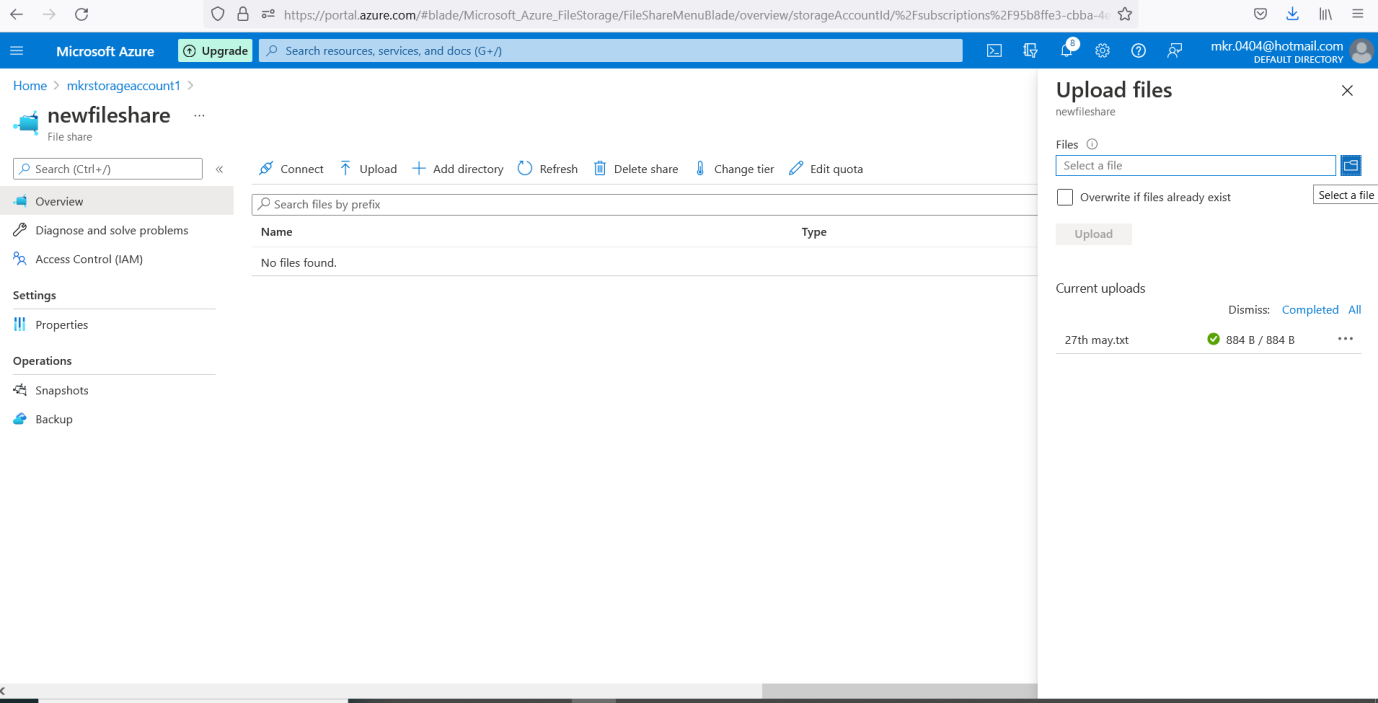
Once you upload a file , Click on connect to map drive letter >Windows>Authentication method is Storage Account key ( Since it is a Workgroup server)
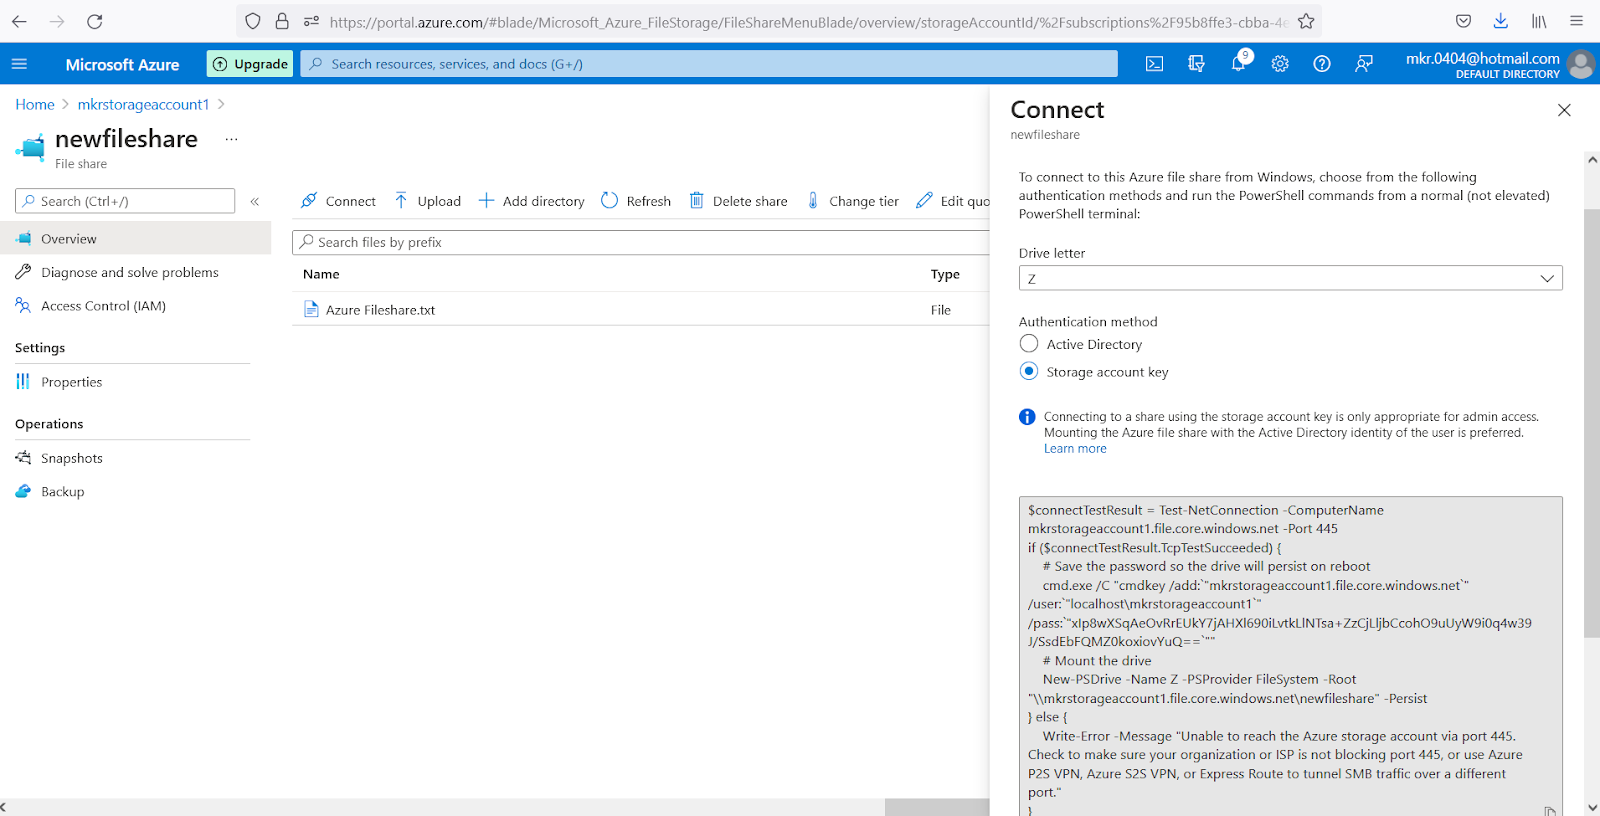
Copy the script generated in notepad. In the Windows VM, open PowerShell and paste in the contents of the Notepad, then press enter to run the command. It should map the drive.
Method 1:

You have now mounted your Azure file share.

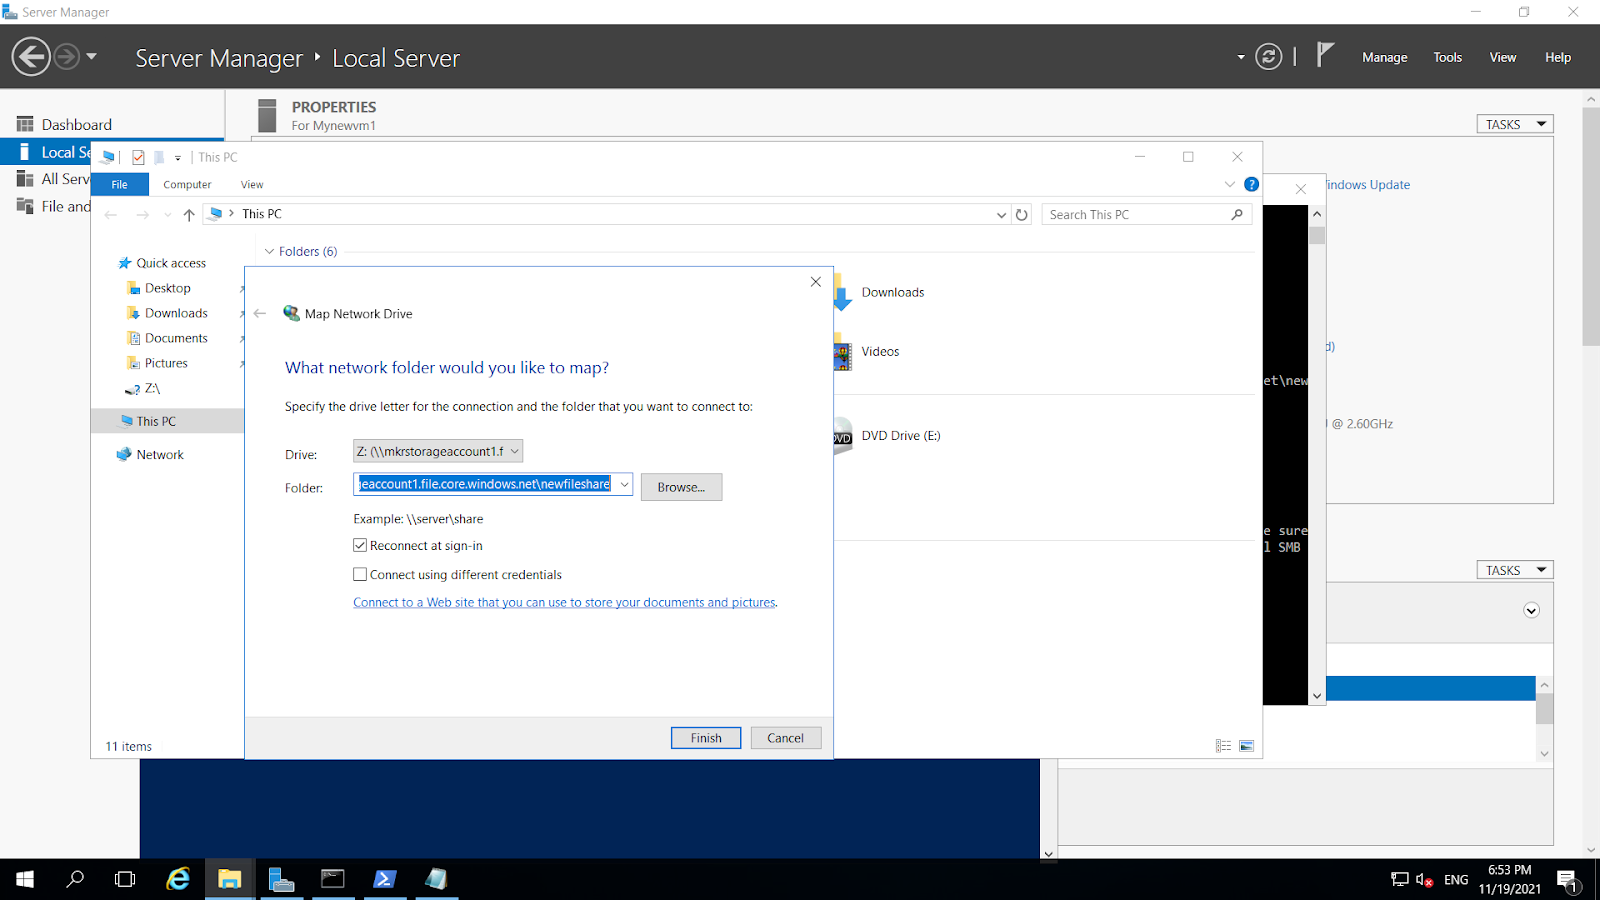
Method 2:
Go to VM>This PC>Computer>Map Network Drive> Finish
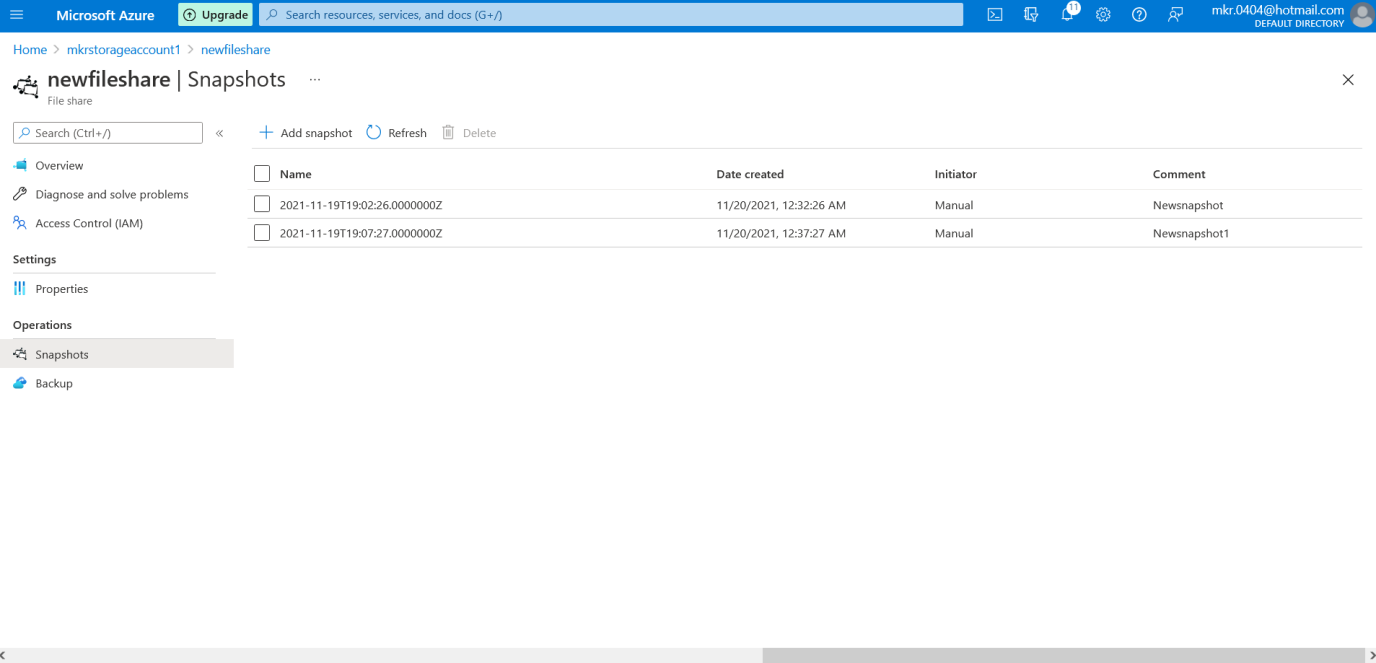
Create a share snapshot
Go to Fileshare created>Snapshots>+Add Snapshot>Provide Name>ok

Go to VM> Modify the file you created with any text

Browse a share snapshot to test the files
On your file share, select Snapshots.On the Snapshots blade, select the first snapshot in the list.
Open that snapshot, and select Azure Fileshare.txt
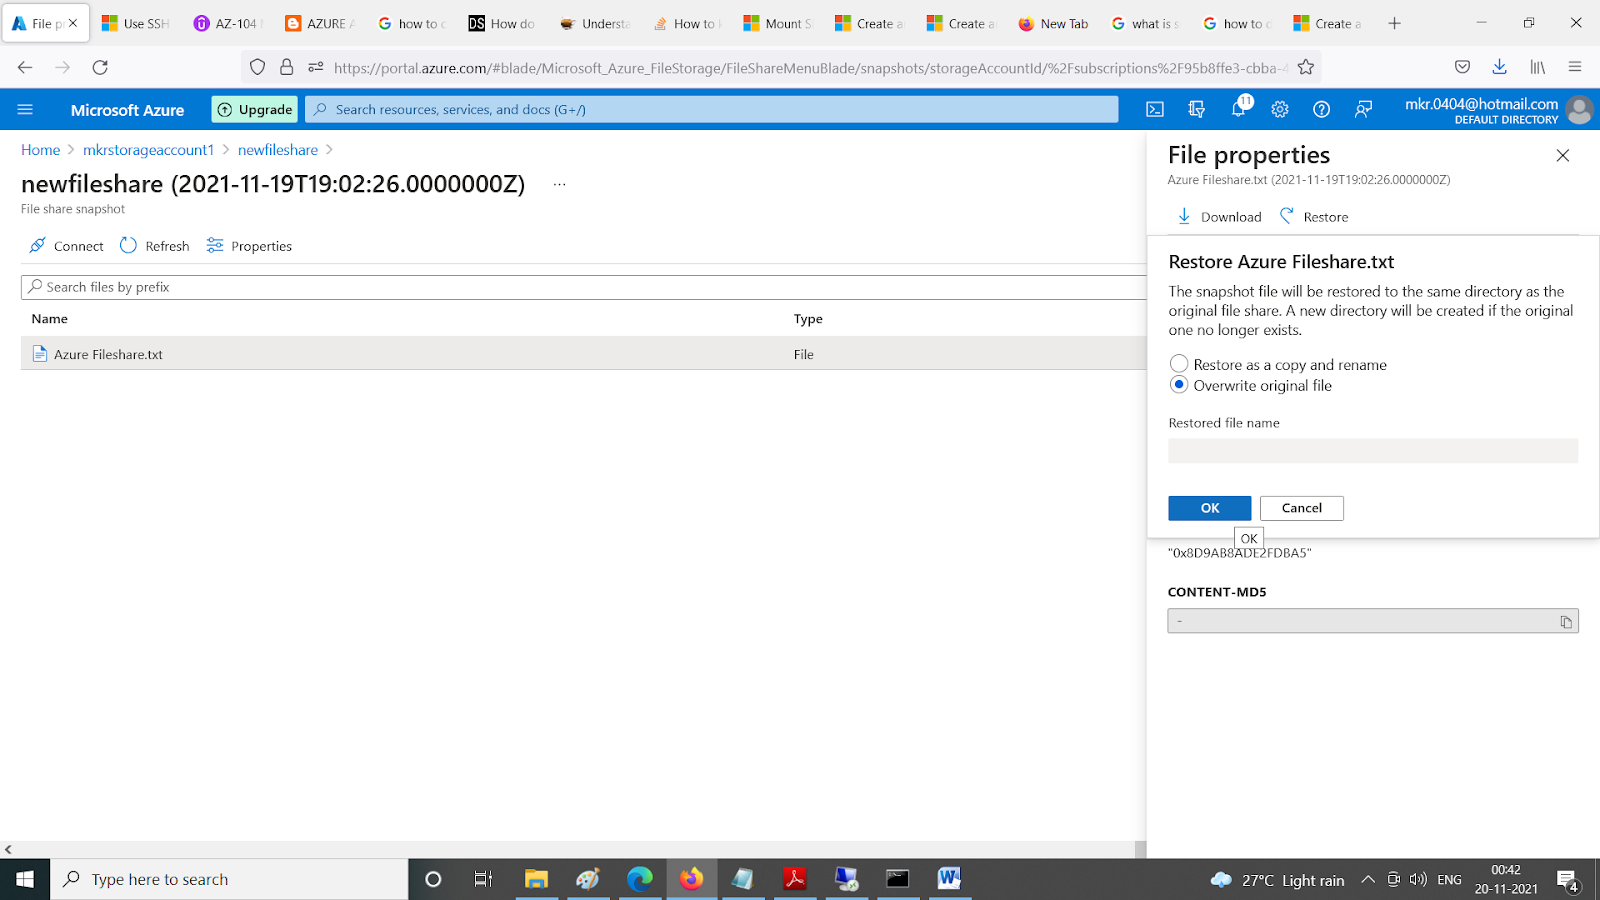
Restore from a snapshot:
From the file share snapshot blade, right-click the Azure Fileshare.txt, and select the Restore button.

Select Overwrite original file.
Delete a share snapshot :
On your file share, select Snapshots. On the Snapshots blade, select the last snapshot in the list and select Delete.
Use a share snapshot in Windows:
In File Explorer, locate the mounted share.
Select Azure Fileshare.txt and > right-click and select Properties from the menu.

Select Previous Versions to see the list of share snapshots for this directory. Select Restore. This action copies the contents of the entire directory recursively to the original location at the time the share snapshot was created.
Steps to mount File share on Linux VM :
Ensure the cifs-utils package is installed.
On Ubuntu and Debian, use the apt package manager:
sudo apt update
sudo apt install cifs-utils
On Red Hat Enterprise Linux 8+ use the dnf package manager:
sudo dnf install cifs-utils
On older versions of Red Hat Enterprise Linux use the yum package manager:
sudo yum install cifs-utils
On SUSE Linux Enterprise Server, use the zypper package manager:
sudo zypper install cifs-utils
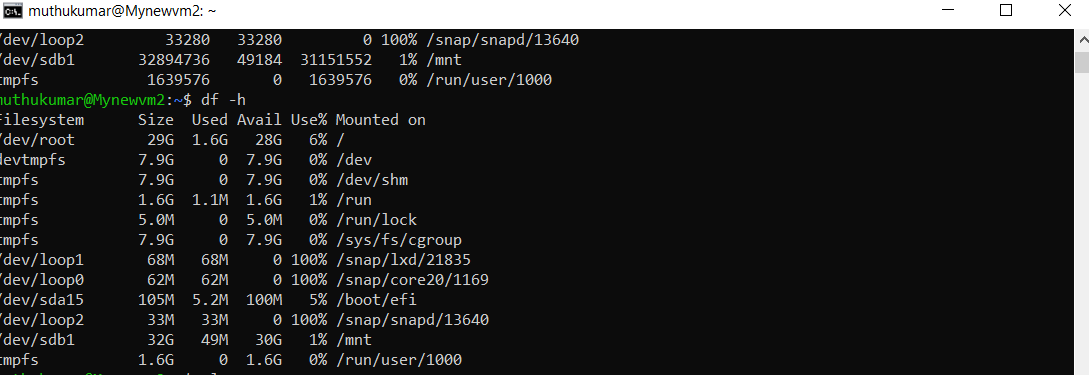
Login to Linux server from Putty:

df –h to display the amount of available disk space for file systems details
Copy the script generated in notepad. In the Linux VM, paste in the contents of the Notepad, then press enter to run the command. It should map the drive.

Follow the same steps we used in Windows File share for recovery process.
Thank you !


Comments
Post a Comment